DIY Color Block Glitter Christmas Trees
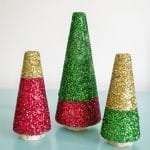


These DIY color block glitter Christmas trees are such a fun DIY project you can make this holiday season! Made with simple supplies, anyone can make this easy Christmas craft to spruce up their home for the holidays. Color blocking gives this craft such a modern twist!

Why this project works
This is such an easy project, but it packs a lot of holiday punch with some simple supplies you probably already have in your house. I mean, what’s better than glitter for a festive craft?!
The color blocking just makes this project so modern and fun. If you haven’t tried color blocking before, it’s exactly what it sounds like.
Use one color while blocking off a portion of your project and repeating with the other color to create two or more distinct colors on your object. It’s best to use contrasting colors for a really bold, modern look.
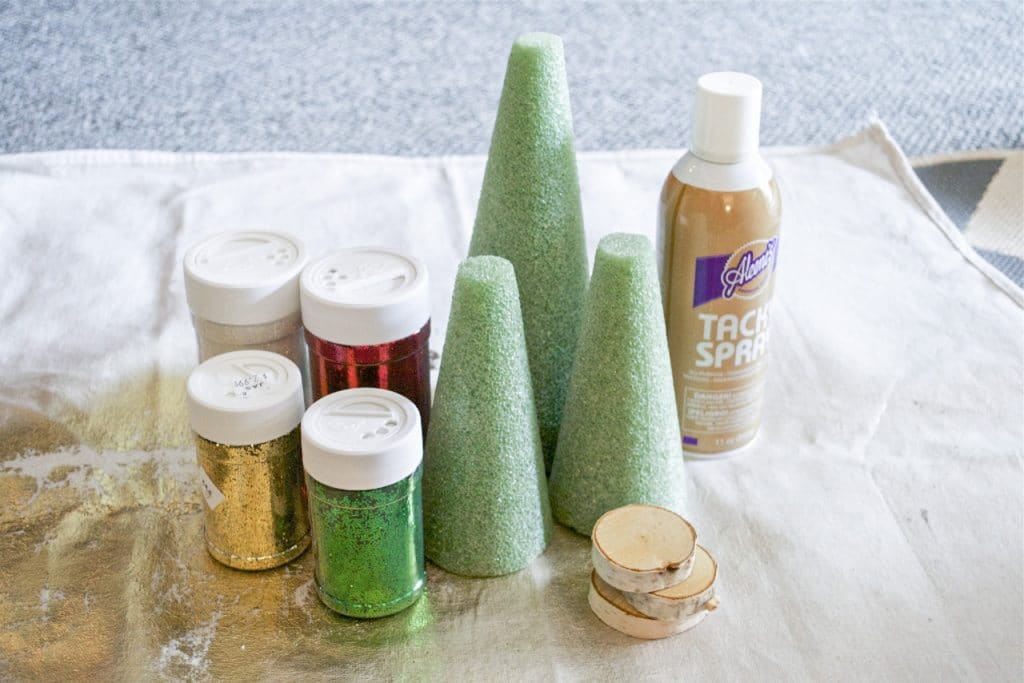
Supplies
This post may contain affiliate links. As an Amazon Associate, I earn from qualifying purchases. This means I may receive a small commission at no extra cost to you if you make a purchase through my link.
Featured Products
FAQs
If you notice that the glitter is falling off the tree, you can protect the tree by spraying it with hairspray!
You can use Elmer’s glue with a foam brush or even spray adhesive.
You don’t have to use a birch round as the base of the tree. You could have your styrofoam trees sit on whatever surface you are displaying them on. I just think the birch round gives the tree a more finished look.
Expert Tips
- Line your workspace with a drop cloth or newspapers so you don’t make a mess and for easy clean up. Remember, glitter is one of those things that you will find months later if you don’t take care to keep it all contained!
- I found it helpful to have two separate stations. One was my gluing station and one was my glitter station so that I could reuse any glitter that fell off the tree. I used a drop cloth for the gluing station. For the glitter station, I lined a baking sheet with foil and placed a sheet of paper on the baking sheet for the glitter to catch it a bit easier so I could reuse the leftovers as much as I wanted.
Step-by-Step Process
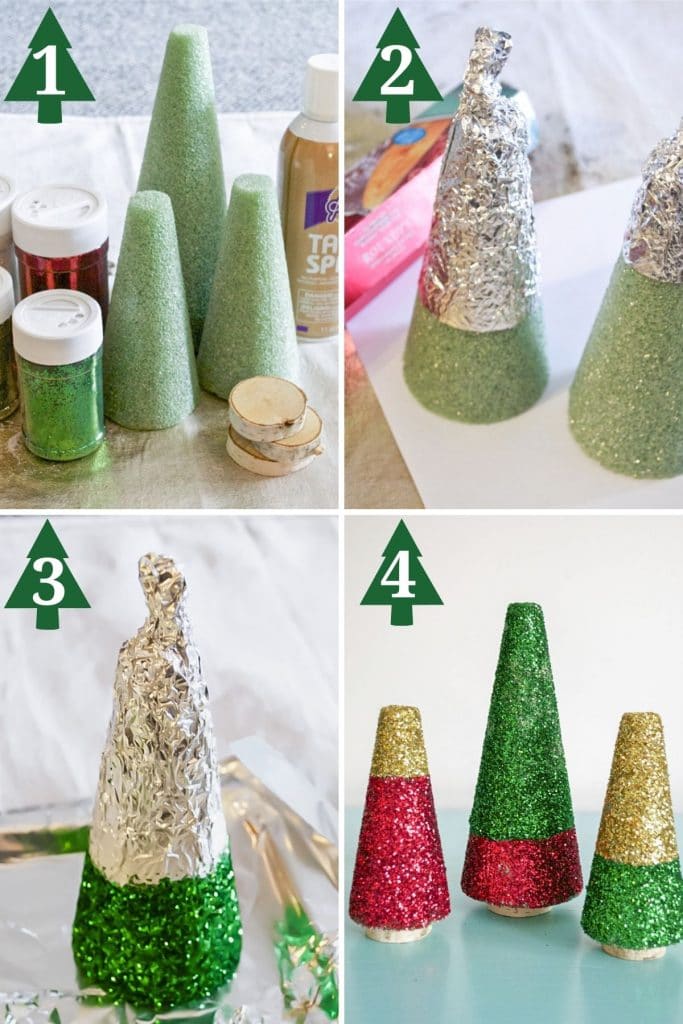
These DIY color block Christmas trees are so easy to do with just a few simple steps. Use whatever color glitter you want and mix and match for some festive DIY Christmas decor!
- Line your workspace with a drop cloth or newspaper.
- Tape off or form foil over the part of the foam cone that you do not want to glitter first. I used foil which worked quite well and then trimmed off any excess with my x-acto knife for a straight edge.
- Brush mod podge on the portion of the cone that you want to glitter. Then pour the desired glitter color over the cone until completely covered. Set aside to dry completely. Repeat with remaining cones.
- Once each cone has dried, take off the tape or foil.
- Brush the remaining part of each cone with the mod podge and pour a different color glitter over the cone to contrast the other half of the cone. I did not really measure where I wanted my two colors to start/end. I just basically wanted then to be 1/3 one color, 2/3 another color. However, you can use a ruler if you would like.
- Set the cones aside to dry completely. Once the cones have dried, cover the birch rounds with hot glue and attach to the bottom immediately. You want to make sure you have at least half inch around the birch rounds to the edge of the Christmas tree to have enough contrast in size.
- Allow the hot glue to dry for a few minutes.
Cost
This is a fairly inexpensive Christmas craft. With a total of 3 christmas cone trees, I spent roughly $20 for this project. The largest expense comes from the styrofoam cones and the birch rounds.
I was able to find the cones in a 3 pack and the birch rounds I purchased in bulk to use in other projects. The glitter and glue were something I already had on hand, but I prorated the cost into the total. I used aluminum foil to block off my trees because I had that on hand.
Always try to use what you have on hand to keep the costs down on your projects and prevent waste. Get creative!
More Christmas DIYs and Recipes

DIY Color Block Glitter Christmas Trees
Easy DIY Color Block Glitter Christmas Trees are a fun, modern take on classic glitter tree decor! Just a few supplies are needed that you can find at your local craft store to make this festive Christmas DIY!
Materials
- 3 craft styrofoam cones
- red glitter
- green glitter
- gold glitter
- Mod Podge
- painters tape or aluminum foil
- 3 birch rounds
Tools
- foam brush
- hot glue gun
- hot glue sticks
Instructions
- Line your workspace with a drop cloth or newspaper.
- Tape off or form foil over the part of the styrofoam cone that you do not want to glitter first. I used foil which worked quite well and then trimmed off any excess with my x-acto knife for a straight edge.
- Brush mod podge on the portion of the cone that you want to glitter. Then pour the desired glitter color over the cone until completely covered. Set aside to dry completely. Repeat with remaining cones. Once each cone has dried, take off the tape or foil.
- Brush the remaining part of each cone with the mod podge and pour a different color glitter over the cone to contrast the other half of the cone. I did not really measure where I wanted my two colors to start/end. I just basically wanted then to be 1/3 one color, 2/3 another color. However, you can use a ruler if you would like.
- Set the cones aside to dry completely. Once the cones have dried, cover the birch rounds with hot glue and attach to the bottom immediately. You want to make sure you have at least half inch around the birch rounds to the edge of the Christmas tree to have enough contrast in size.
- Allow the hot glue to dry for a few minutes.


One Comment